How to integrate and use Shopify with Zuper?
Zuper-Shopify Integration provides a convenient way to manage
your work orders and assets while keeping your customer data safe and secure.
With this powerful integration, you can easily create work
orders from Shopify which will be scheduled, dispatched, and fulfilled using
Zuper and updated back in your Shopify order once the job is complete.
Best of all, this two-way integration helps ensure that your
field service processes running smoothly from start to finish.
 Pre-Requisites: Zuper API Key and Shopify OAuth -
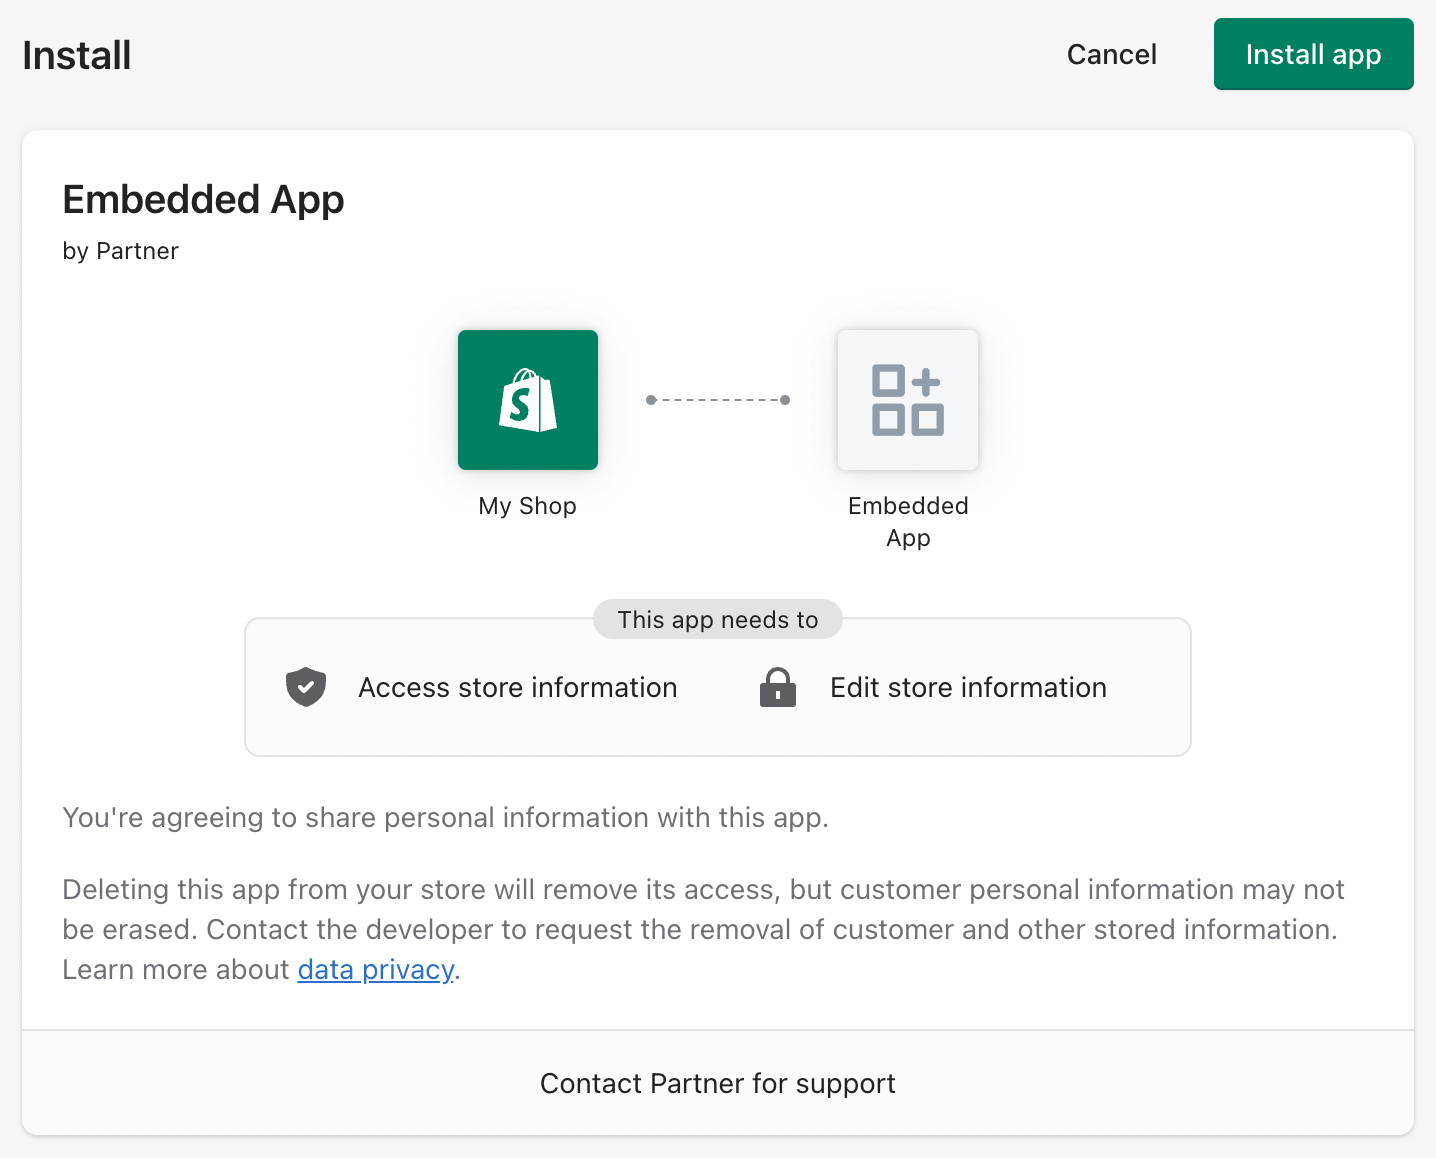
Note: When they click on install in our app store, they will be presented with this screen to give permission to their Shopify account. This process is called OAuth.
A. How
to connect your Shopify with Zuper?
1. Open a new tab in your browser once you are logged in to your Zuper Account.
Click your Profile Picture in
the top right corner of the screen and select the “App Store.”
2. Under the “Browse
by Category,” select the “Commerce”
option and choose “Shopify.”
3. Click on the
“Install Shopify”
button.
Note: With Zuper
and Shopify tabs open, you can switch between the tabs for integration.
Switch to the Zuper tab on your browser and log in to your Zuper account. Update Zuper Settings
by configuring the following fields:
a. Store Domain (Mandatory Field) – Enter the store section name from your Shopify app.
b. Identify Customer By (Mandatory Field) – You can use either an email ID or Name for the identification.
c. Create Product Masters (Mandatory Field) – The list of products present in Zuper. You can choose either “Yes” or “No” to sync the product masters from your Shopify account.
d. Select Job Type –
You can either choose “Single Job for Order” to create a work order as a single or “Separate Job for Order” to form
multiple work orders for each item.
e. Create Line Item as Asset (Mandatory Field) – You can either choose “Yes” or “No” for the asset formation from the line item.
f. Close Shopify order upon Zuper Status
(Mandatory Field) – Enter the Zuper status against
which the Shopify order will be closed.
g. Default
Job Category UID in Zuper (Mandatory Field) – Enter
the unique Zuper’s work order categorization id. (Contact Zuper
Support team to fetch this ID).
h. Default Due Date in Zuper (Mandatory Field) – Enter the number of
days for the work order completion from the current day.
i. Product
Categories in Shopify to consider for Asset – A
list of product types from Shopify that need to be considered as Assets can be
entered here. (For instance: Refrigerator, AC unit).
Note: To
add multiple product categories, use a comma to differentiate each category.Note: If the
user does not specify the product category, then for all the products of
Shopify, assets will be created in Zuper.j. Shopify
Note Attributes to Sync – The custom fields of Shopify are entered here for
sync with Zuper.
k. Zuper API Key (Mandatory Field) - Enter the
Zuper API key.(Click here: How to generate Zuper API Key).
l. Default Product Category Name in Zuper (Mandatory Field) – You can push all the
products under a single category in Zuper from Shopify.
m. Shopify Tag to Zuper Job Category Mapping (Mandatory Field) – The tags are to identify
work orders of Shopify to identify the same in Zuper.
Select the “Update” button to
connect Shopify app with Zuper.
B. How does Zuper – Shopify Integration work?
1. log in to your Shopify account and create a work order
by choosing the Customer, Product, and relevant tags.
2. Switch to a new
tab, log in to your Zuper account, select the Jobs module, and view the Job created
from Shopify.
As per the
details given in the Shopify account, the relevant details will be fetched in
Zuper as per the integration settings.
You can view
the Shopify Order ID,
and an URL can track Shopify Order Status and Work Order
under the custom fields section.
Note: Based on
the Product Master settings during integration, if the setting is turned to “Yes,” the product will be captured as “Parts
and Services.” If the
setting is turned to “No,” the product will be taken as only a custom line item, which won’t
save the product.3, Now switch
the tab in your browser and fulfill your Shopify order.
4. The
fulfilled order of Shopify will create Assets in Zuper. Based on the quantities
given in Shopify, Zuper will create individual assets.
Note: For instance: Different Asset serial numbers 001 and 002 of 2 ACs with
the same Asset code will be captured in Zuper.5. The list of
assets and the asset’s status can be tracked from Zuper’s Assets module.
C. How to Uninstall Shopify from
Zuper?
1. Open a new tab in your browser once you are logged in to your Zuper Account.
Click on your Profile Picture in
the top right corner of the screen and select the “App Store.”
2. Under the “Browse
by Category,”
select the “Commerce”
option and choose “Shopify.”
3. Click the “Uninstall App” button.
4. The Shopify app is uninstalled successfully.
Once the Zuper
status is updated as “Completed,” the Shopify order will be automatically marked as “Closed.”
The Zuper-Shopify integration
makes service delivery even simpler by helping technicians fulfill those
requests effectively by accurately capturing the service address, streamlining
the workflows, and moving work orders from start to finish smoothly. Shopify
users can make their field operations quick, efficient, and reliable with this
integration.
Related Articles
How to integrate and use Clyr with Zuper?
Introduction: The Zuper-Clyr integration enables you to automate expense management. Track your expenses by adding your credit card details on Clyr. Sync Jobs from Zuper as Projects on Clyr. Associate expenses to Projects on Clyr. Track your expenses ...How to integrate and use Google Calendar with Zuper?
With our Zuper-Google Calendar integration, the user can install the Google Calendar from our Zuper store. Then, post-installation, whenever the jobs are created and scheduled for a particular date, this vital job information will be created and ...How to integrate and use FieldNation with Zuper?
FieldNation is an on-demand field workforce platform that connects businesses with skilled technicians. The user can push their work order details from Zuper to FieldNation, but any status updates & other updates are pushed to Zuper from FieldNation. ...How to integrate and use CloudTalk with Zuper?
With our new Zuper-CloudTalk integration, you can connect your CloudTalk account to Zuper and automatically send outbound SMS through your CloudTalk number. The CloudTalk App is a popular phone app based out of the European region and they support ...How to integrate and use Freshdesk with Zuper?
With Zuper’s first-class integration with Fresh desk, it seamlessly helps to push the Freshdesk tickets to Zuper for deliver an exceptional customer experience. You can create Job from Freshdesk ticket with a bi-directional sync. The three major ...