How to create a new contract in the Zuper web app?
The service contract is the service agreement between the business and the customer, which lists down services that need to be performed, timeline, and other vital information.
By choosing the "Contract Package" helps you to auto-fill all the key fields and all you need to do is to select contract start date, end date, either organization or customer.
 Navigation: Contracts --> + New Contract
1. Select the “Contracts” icon from the left panel and choose “+ Contract” to create a new contract.
2. A new contract creation page appears. Fill in the following details under each section.
Contract Details
1. Contract package (optional): Choose the "Contract
Package." This helps you to auto-fill contract details from the predefined packages. (You can
configure these packages by going to Settings -> Service Contracts)
You can also view the "Contract Period," and Parts & Services are automatically pre-filled based on the selected contract package.
2. Contract Prefix: The prefix for identifying the Contract.
3. Contract Name (mandatory): The name identifying the Contract.
Contract Period
1. Contract Term (mandatory): The period of the Contract (In Months).
2. Contract Start Date (mandatory): The start date of the Contract.

Note: Once you choose the "Start Date," the invoice details are filled automatically based on the package.
3. Contract Expiry Date (mandatory): The end date of the Contract.
4. Activation Date (optional): The date on which the contract gets activated.
Primary Details
1. Contract Ref. No. (optional): The unique number identifying the Contract.
2. Contract Type (mandatory): The type of the Contract.
3. Contract Template: The standard template for the Contract.
4. Contract Description (mandatory): The description of the Contract.
Part/Service Details
1. Choose the part/service that you like to add in this contract. You can add from:
- Line Item - Choose this if you want to add any part or service that needs to be included in the quote.
- Bundle - Choose this option to include any product bundle in the quote.
- Header - If you wish, you can add the "Line Items" header for identification.
- Item Group - Choose this if you want to add any items from group to the quote.
- Custom Line Item - Choose this if you want to add any ad-hoc line item that needs to be included in the quote.
After adding the parts & services to the contract, either transactional level or line-item level discount will be applied to that contract based on the organization settings.
If you want to update the discount amount, click the “Edit” icon next to the “Discount
” option or use the "Settings"  option next to the Parts & Services section to modify the discount type. Based on the applied settings, you can choose how discounts are applied.
- Line-item level: This allows you to apply discounts to each individual line item added to the quote.
- Transactional level: This applies discounts based on the subtotal of all items added.
Note: When a line item has a custom tax, and the contract includes a mix of taxable and non-taxable parts and services:
- Only line-item level discounts can be applied.
- Transactional level discounts cannot be applied in such cases.
Transactional level discounts are only applicable when all parts and services in the contract are either fully taxable or fully non-taxable.
This restriction ensures accurate calculation of discounts and taxes for line items in the contract and prevents any miscalculations.
3. Next, select either the Contact or an Organization for whom you are creating this contract at the right side.
4. You can link the Property to the contracts if required.
5. The billing period section is to manage the automatic invoice related details.
The automated creation of renewal dates based on the current expiry
date, a new feature offered by Zuper, can greatly benefit service businesses in
efficiently and systematically renewing their annual maintenance contracts
during the editing of the contract or renewal of the contract. 6. Add asset to the contract, as needed.
7. Click the "+ Create PPM" button to create a new PPM for the asset added to this contract, if required.

Info: To know more about how to add new PPM to the asset, see How to access and manage contract details in the Zuper web app?
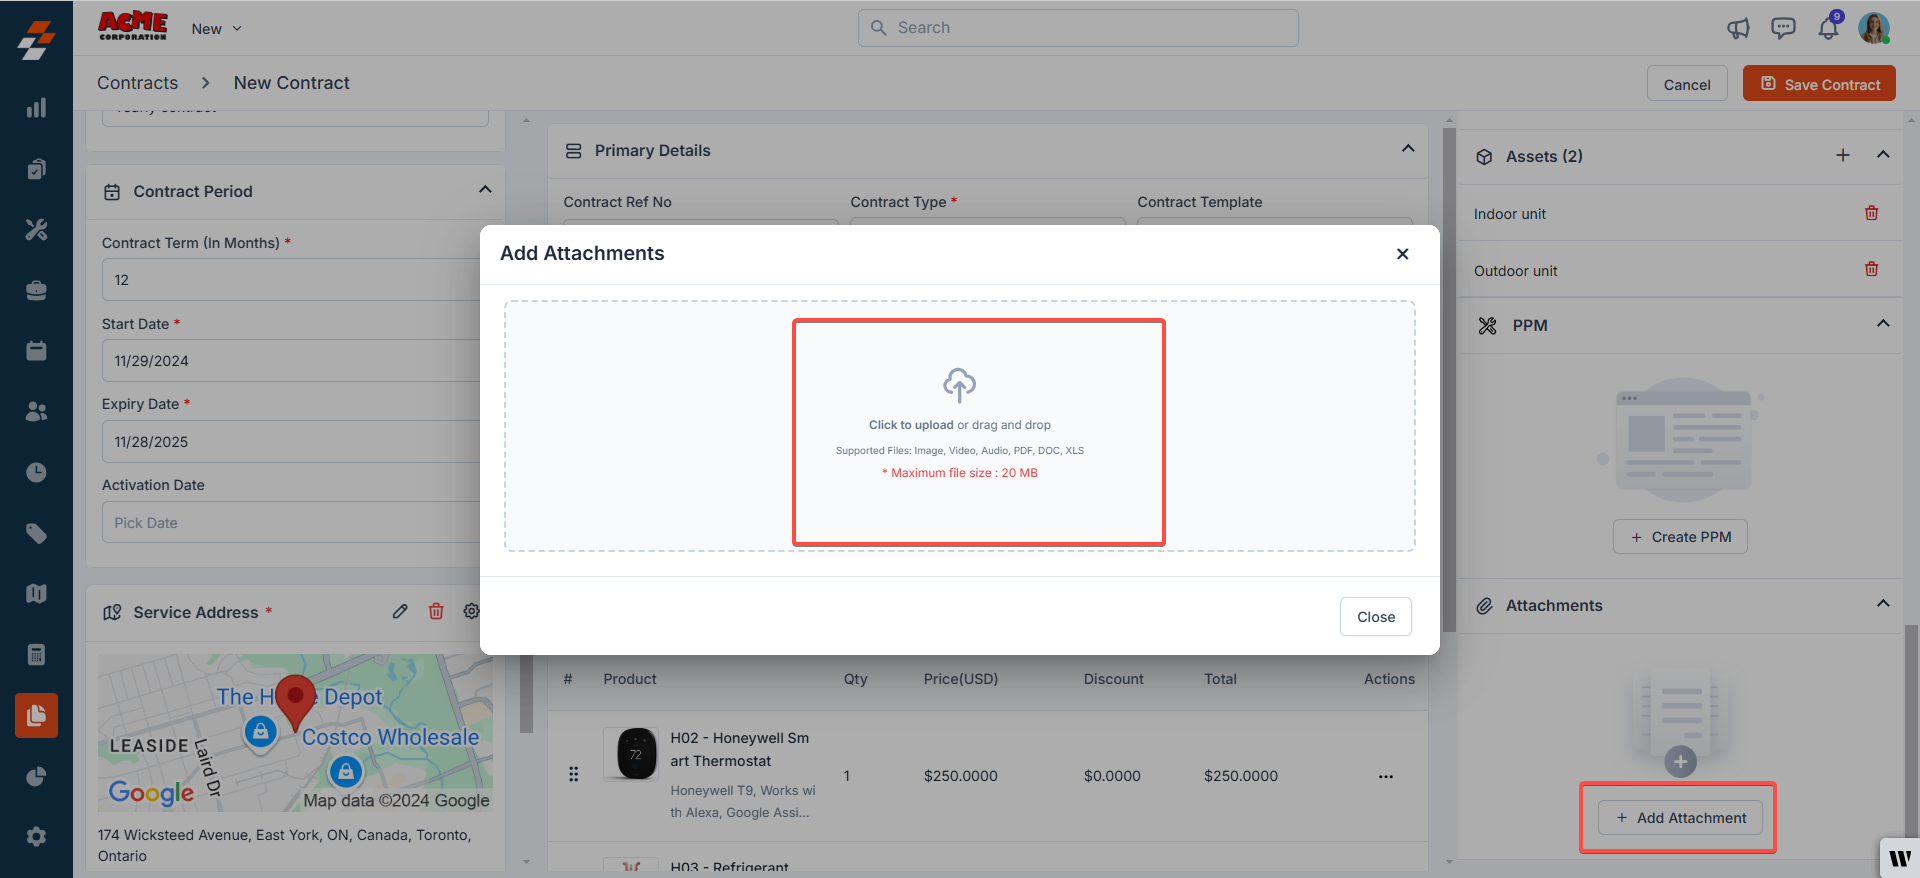
8. Click "+ Add Attachment" to upload relevant files or documents to the contract.
9. After filling in all of these details, click "Save Contract" at the top right corner of the page.
10. A "Save Contract" dialog box appears. Click the "Create" button" to create the contract.
9. The new contract is created successfully.
Zuper offers an exceptional service contract creation experience, streamlining the process with interconnected modules that make contract creation faster and more efficient.
Related Articles
How to navigate and manage the contracts listing page in the Zuper web app?
The Contract details page lets you view the complete information of the contract and all its associated records in a single place. From the contract listing page, you can click any one of the contract names to go to the contract details page. ...How to access and manage contract details in the Zuper web app?
The Contract details page lets you view the complete information of the contract and all its associated records in a single place. From the contract listing page, you can click any one of the contract names to go to the contract details page. ...How to create a new AR (Account Receivable) invoice in the Zuper web app
An invoice is an accounting document that a field service business sends to its clients to request payment for the services rendered. Navigation: Accounting --> Invoices --> + New Invoice 1. Select the “Invoices” icon from the left navigation menu ...How to access and manage contracts in the Zuper mobile app?
The contracts module in Zuper is designed to streamline the management of service agreements. It allows you to efficiently create, modify, and manage contracts, ensuring they are properly mapped to the right organization. This module is essential for ...How to create, edit and delete an asset in the Zuper web app?
Any item purchased by a company as a product and, when distributed to a customer service location to fulfill a job, contract, or service agreement, is referred to as an asset. It can either be owned by the customer or by the company itself. Here's ...