How to navigate and manage the Jobs listing page in the Zuper web app?
Zuper's
robust job management system lets you effortlessly oversee every aspect of your
jobs in one centralized platform. Quickly create and assign jobs, set
priorities, and schedule service tasks with our intuitive interface.
With
our powerful filtering and search capabilities, you can easily find and manage
jobs based on various criteria. You can also track job progress in real-time,
access detailed job information, and communicate seamlessly with field
technicians and customers.

Navigation: Jobs -> Job Listing page
Accessing jobs listing page
1. Select the "Jobs" module from the left navigation menu. You can view the list of jobs in the Jobs listing page.
2. Use the Search icon to find a specific job(s) using free-text keywords. By default, this search looks up against the work order number and job title.
Note: If you would like to use the free text search to search across other fields such as address, custom fields, etc,. please reach out to our support team support@zuper.co to enable them.
3. Click the "Export" button at the right to preview and download the Jobs Report as an Excel file.
4. Click the "Customize" button at the top right corner to customize the table columns. You can also reorder the columns by dragging and dropping them using the  icon.
icon. 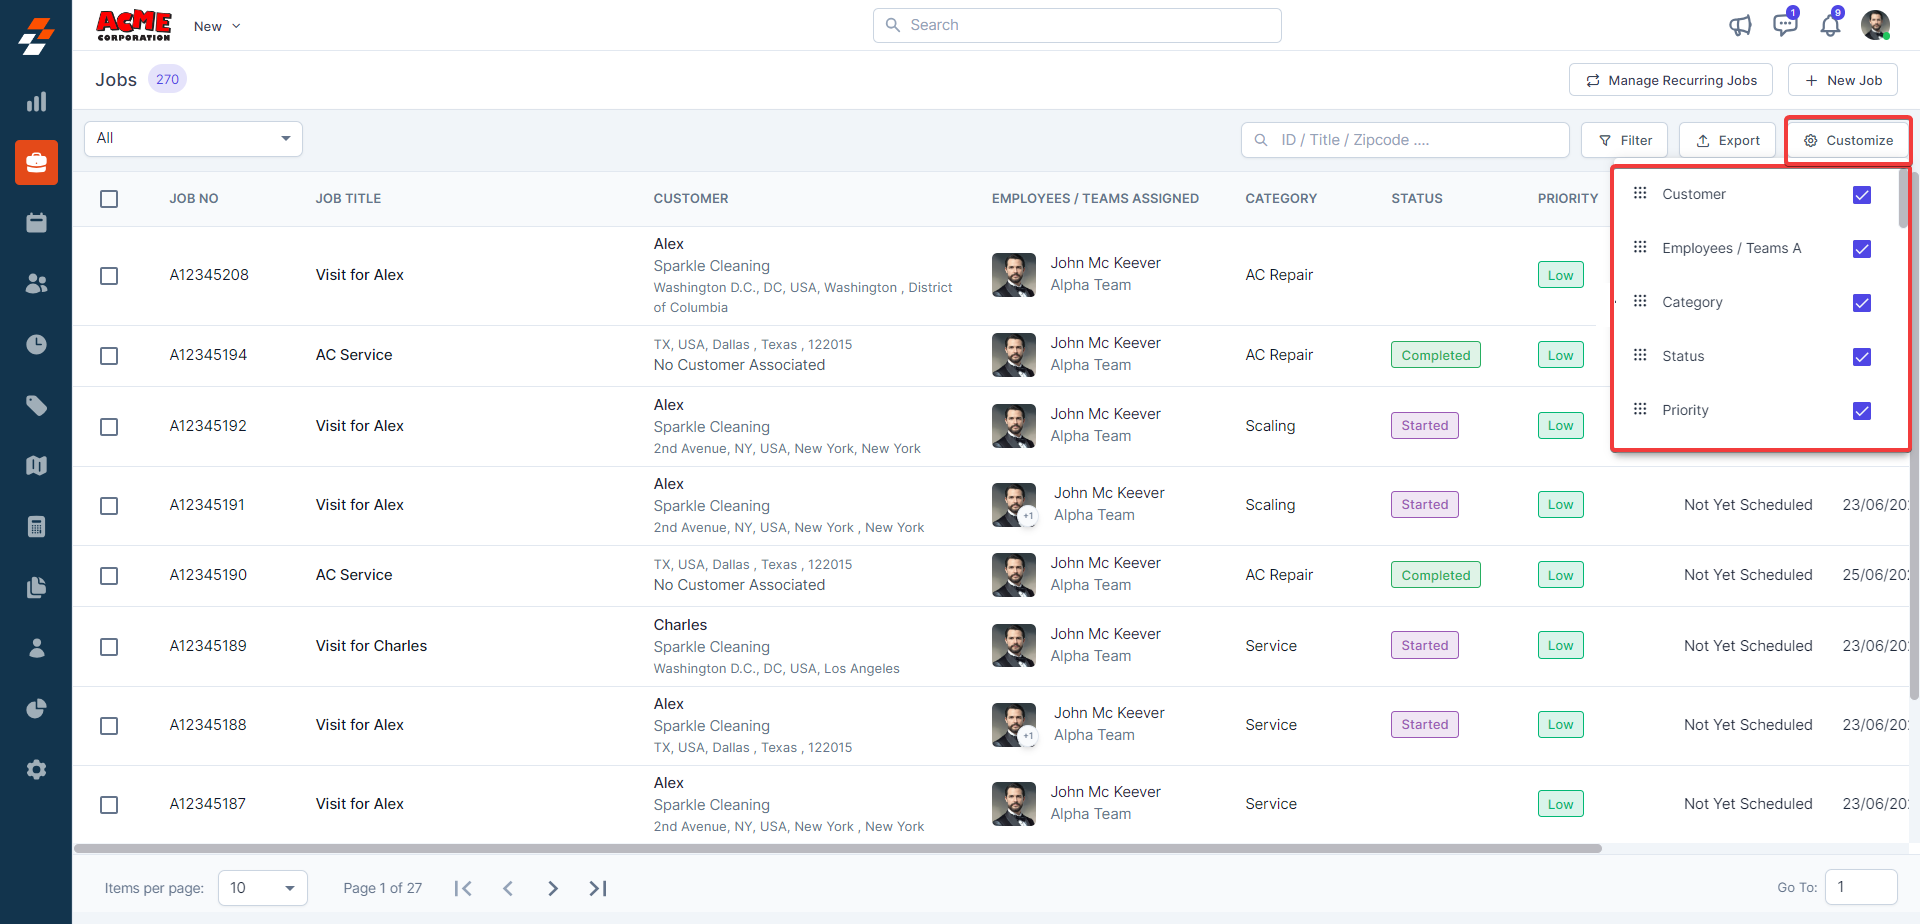
5. Click the "+ New Job" button to create a new job.
6. Click the "Manage Recurring Jobs" button at the top of the Jobs listing page to create and manage recurring jobs.
7. The bottom panel enables you to customize the items per page. You can use right and left arrows to navigate between the pages.
8. Enter the page number in the "Goto" option to navigate the page.
9. You can also perform bulk actions such as updating fields, modifying schedules, changing job statuses, and more. To do this, select the checkboxes next to the jobs you want to modify, and a bottom bar will appear with available actions.
Note: If you check all of them in the table column, it will select all records across the pages. Hence, it is recommended to use a filter and perform a bulk action on a limited set of data. By default, bulk action is limited to a maximum of 1000 records at a time.
10. Select the specific action. Here, we have chosen "Update Field."
Select the field to be updated and click the "Update" button.
Select the field to be updated and click the "Update" button.
11. The fields will be updated successfully.
How to apply a filter and save it as a quick filter
A filter icon  at the right allows you to apply multiple filters based on specific fields. To do so, follow these steps:
1. Click Filter>> Add Filter.
2. Choose the specific field type>> apply conditions and click the "Add" button to add this filter.
3. You can also add multiple filters by clicking the "+ Add Filter" button. Once added, click the "Apply " button to view the result.
4. To remove the applied filter, click Filter>> Remove or "Reset Filter" button at the bottom.
5. You can also save the applied filter, which will be added to the quick filters section at the top left corner. To do so, check the "Save applied filter" checkbox.
A dialog box appears.
6. Enter the "Filter Name" and "Filter Applicability".
If you choose the filter applicability as selected teams or users, enter the team/user name(s) in the box below. Once done, click the "Save Filter" button.
8. A new quick filter will be created successfully and added to the quick filters section at the top left corner.
9. To access and manage quick filters you added, click the dropdown menu in the quick filter at the top left corner and select 'Manage Filter' option. This allows you to view and add/delete filters as needed.
Related Articles
How to navigate and manage projects listing page in the Zuper web app?
The projects listing page provides an overview of the projects you have access to with summarized information like project number, name, status, and other records. (For step-by-step instructions on how to create a project, click here). Once created, ...How to navigate and manage your AR invoice listing page in the Zuper web app?
An invoice is a document for the parts & services rendered by your business. Zuper enables you to manage the complete lifecycle of invoicing including sending to your clients, receiving payments, etc,. Navigation: Invoices -> Invoice Listing Page ...How to manage your customers' assets / installed base in the Zuper web app
Any item purchased by a company as a product and, when distributed to a customer service location to fulfill a job, contract, or service agreement, is referred to as an asset. Additionally, the asset can either be owned by the customer or by the ...How to navigate and manage the Quotes listing page in the Zuper web app?
A quotation, also known as an estimate, is a document that covers the parts or services you’ll need to complete a job and their approximate cost. Quotations are sent to customers before the commencement of a job for acceptance. Zuper's Quotation ...How to access and manage jobs in the Zuper mobile app?
In the Zuper mobile app, the Job details page is a central hub where you can manage all aspects of a job, from editing job details to adding notes and messages. Whether you need to update a job title, change its priority, or keep a record of ...