How to create a job in the Zuper web app
Creating a job in Zuper is a straightforward process designed to streamline your business workflow. Zuper also lets you customize the jobs with additional properties tailored to your business. Once created, the job will appear in your schedule board and be visible to assigned technicians through their mobile app
 Navigation: Jobs --> + New Job
Job Creation
1. Select the Jobs module from the left navigation menu and click “+ New Job.”
2. The new job page is designed in a three pane layout to make it easier for you to key in the relevant data.
- The left pane lets you enter job title, schedule, address
- The center pane lets you enter other necessary information about the job
- The right pane lets you associate any related records such as customer, properties, assets, etc,.
A. Job Details
- Prefix - The Job prefix is pre-filled from the settings.
- Job Title (Mandatory) - Enter the title of the Job.
B. Primary Details
- Job Category (Mandatory): Choose the Job category from the drop-down menu. Selecting a category enables the "Check Availability" option in the "Job Schedule" section.
- Other Fields(optional): Choose/enter in the Job priority, Job Type, Parent Job (in case of revisit job), Job Tags, and Job Description.
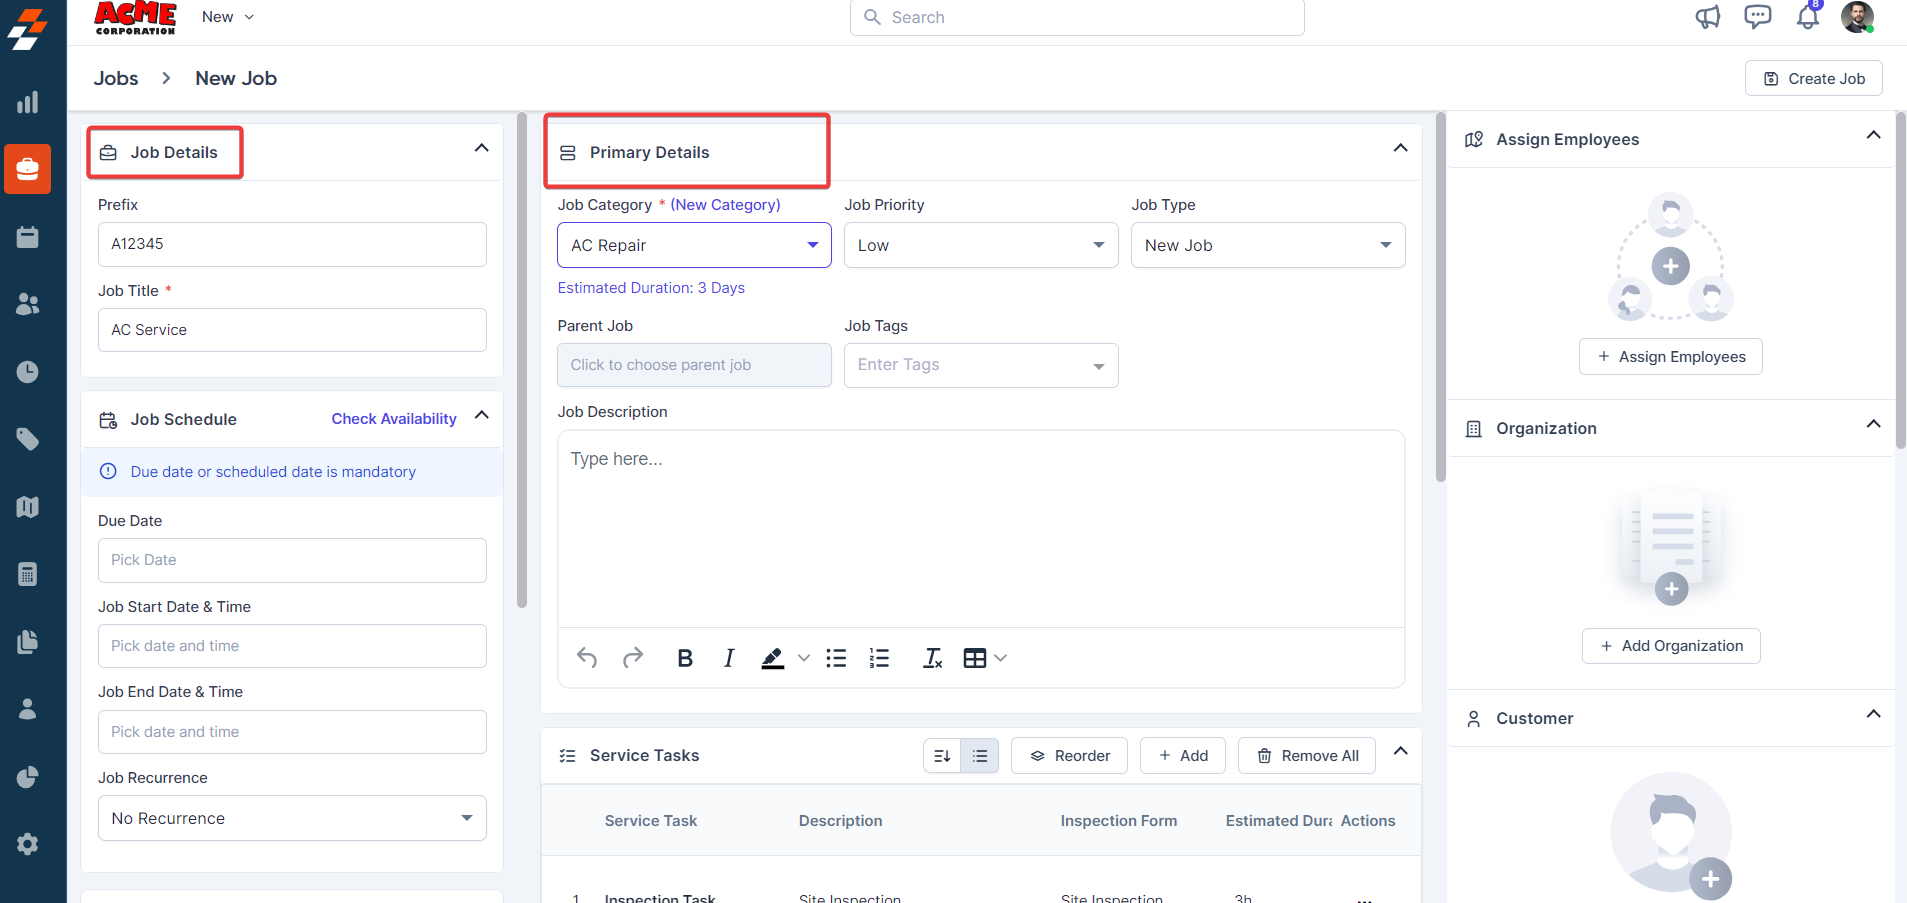
C. Job Schedule
- Click the "Check Availability" button. A pop-up will appear.
Fill in the following fields, then click the "Use this Schedule" button to schedule the job:
- Choose Date: Select the date for the job.
- Choose Team: Assign a team to the job.
- Choose Skill: Select the skill required for this job.
- Choose Service Territory: Pick the service territory for the job.
- Choose a Slot: Select the time for the job.
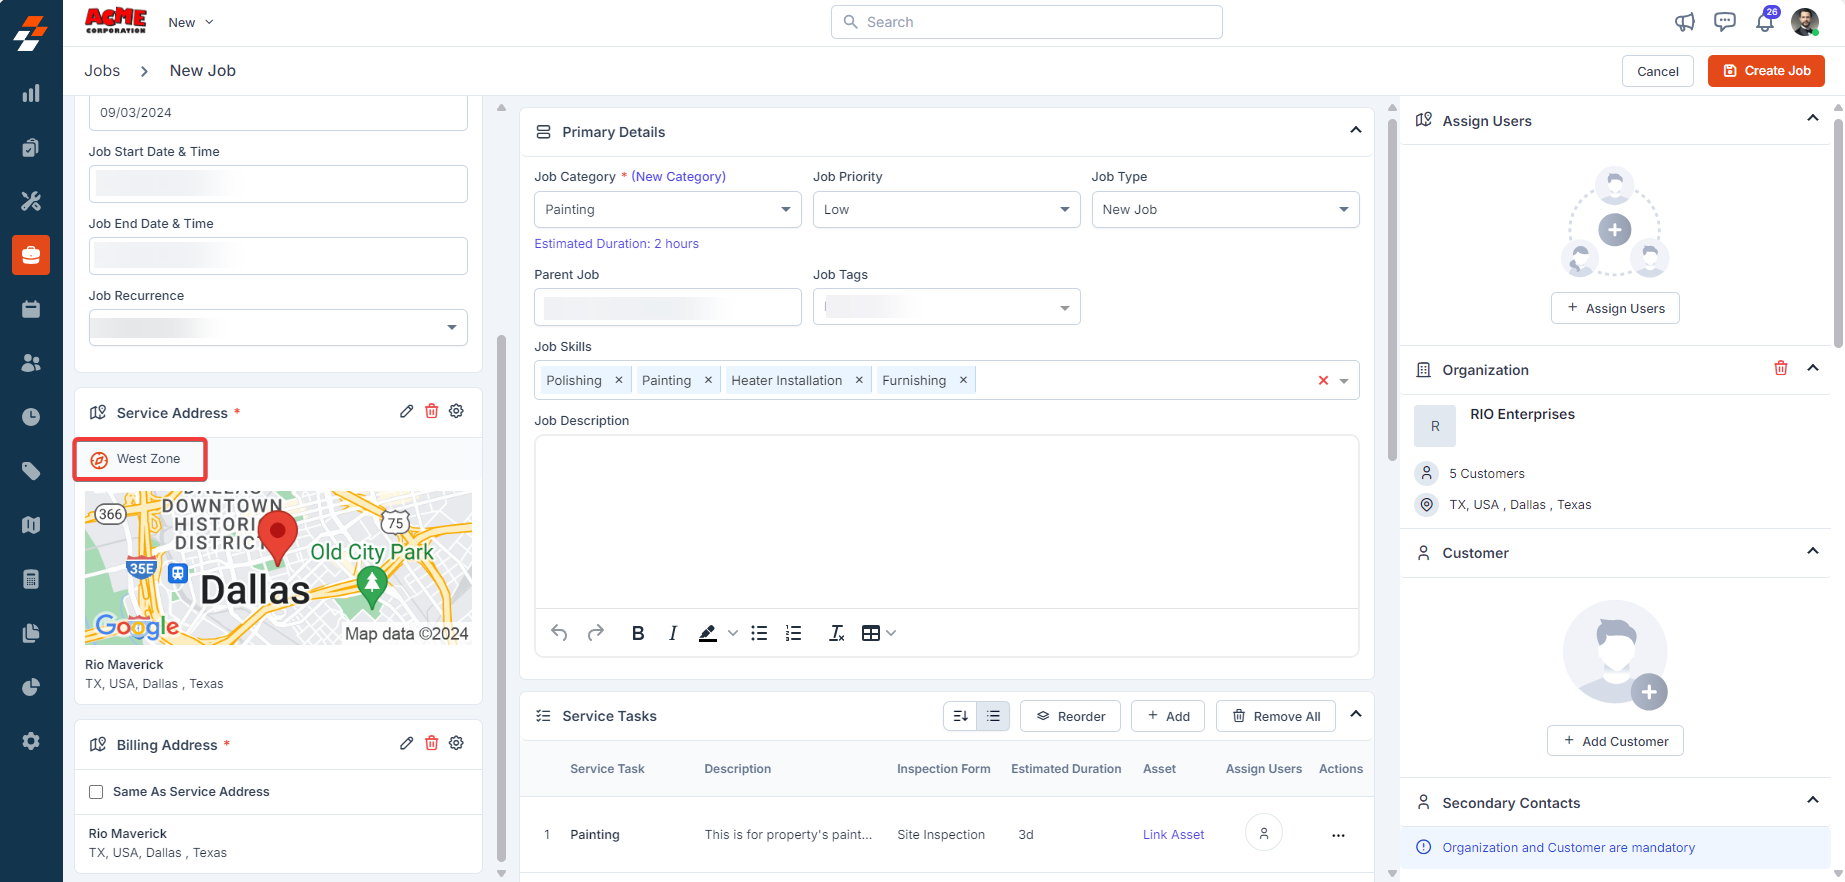
3. Click the "+ Add Organization/Customer" button at the right of the page to add an organization or customer.
4. The "Service Address" will be automatically pre-filled based on the selected organization or customer. You can choose to use the same address or a different one for the billing address.

Note: If you want to modify the service address, click the " " edit icon. Make sure you select either the address or Geo-coordinates.
5. The Service Territory is auto populated if the selected organization or customer service address falls within the geo-radius, geo-fence, and zip code defined for that service territory.

Alert: You may encounter the following Conflict(s) pop-up indicating issues that need to be resolved for proper territory assignment.
- Multiple Territory: If the job address falls under more than one Service Territory, the system will choose the first territory by default. You can manually select the most suitable territory by clicking the 'Assign' button from the list of available territories on the respective Job’s detail page.
- No Service Territory: The job’s Service Address does not fall within any predefined service territory, you can manually assign the appropriate service territory on the respective Job’s detail page.
- Assignment Mismatch: If the team/user(s) assigned to the job does not belong to selected service territory, you can reassign the job to the appropriate team or user(s) on the Job’s details page.
Remember, you can only assign and update services territories on the respective Job’s detail page.
D. Service Tasks
Service tasks are individual well-defined/predefined tasks inside a Job that have their own Start, End Date, and employee assigned. To learn more, see How to create & manage service tasks in the Zuper web app
By default, service tasks are pre-filled based on the selected job category. If not, you can add them manually. Here's how:
1. Click the "+ Add" button from the Service Tasks tab. You can select existing service tasks or create a custom task.
2. Select the tasks and click the "Add" button to add them to the job.
E. Part/Service Details
Parts and services are essential for completing a job. You can easily add various parts and services to the job. To learn more, see How to create new parts/services in the Zuper web app
Note: When adding a new group, if any parts within the group have already been added, the system will not create a new line item; instead, it will simply increase the quantity of the existing item.
1. Click the "+ Add" button in the Part/Service Details section. A drop-down menu will appear, prompting you to choose how you would like to add parts & services:
- Add from "Line Item," "Item Group," or "Custom Line Item."
2. Select the required part from the pop-up that appears, fill in the details, and click the "Add Product" button.
Click the "Meatballs" icon  and a dialog box appears. From here you can select the required "Serial Numbers" from the drop-down list.
- Complete the "Other Details" section (any custom job fields will be displayed here).
- Click the "Create Job" button to finalize the job.
2. A new job is created successfully.
Associations
You can associate the job with various modules on the right side of the page, including:
Secondary Contacts
1. Click the “+ Add Secondary Contacts” button at the right of the page to add secondary contacts. You can select up to 10 secondary contacts. Now, users can add secondary contacts independently, even if no organization is selected. This improvement allows for greater flexibility in managing contacts that may not be directly tied to a specific organization.
Note: To add secondary contacts, make sure "Enable Secondary Contacts" is set to "Yes" in Organization Settings > Job Settings, as shown below.
Assign Users
To complete the task, you need to assign it to users. The available "Teams" and "Users" are listed based on the job address and its associated Service Territory.
Note: If you want to view all teams and users' Service Territory, unselect the "Filter by Territory" checkbox.

Important: Teams and users are filtered and displayed based on Service Territory only if you have activated the “Enable Service Territory” option in Settings > Organization Settings > Service Territory.
Follow the steps below to assign user to the job:
1. Click "+ Assign Users" under the "Assign Users" section on the right.
2. Choose user(s) from either the "Teams" or "Users" tab and click the Assign icon next to the user.
3. Click the "Save" button to assign the user to the job successfully.
Project
You can associate the job with a project. Once associated, the job will be added to the project module, and the assigned field technician will be responsible for completing the jobs within the project. To link the job with a project, follow these steps:
1. Click "+ Add Project" under the "Project" section on the right. A sidebar appears.
1. Click "+ Add Project" under the "Project" section on the right. A sidebar appears.
2. Select the project to which you want to add this job and click the "Choose Project" button.
Property
To associate a property to this job,
1. Click "+ Add Property" under the "Property" section on the right. A sidebar appears with existing properties associated with the selected organization/customer.
1. Click "+ Add Property" under the "Property" section on the right. A sidebar appears with existing properties associated with the selected organization/customer.
2. Choose any of the existing properties or create a new property by navigating to the "New Property" tab.
3. Click the "Choose Property" button to associate the property with the job.
Contract & Asset
Any contracts or assets associated with the job will be displayed here. You can also associate a contract or asset by clicking the "+ Add Asset" and "+ Add Contract" button in the respective sections.
Attachments
Attachments can include images, videos, audio files, PDFs, DOCs, XLS files, or ZIP files. To add an attachment to the job:
1. Click "+ Add Attachment" under the Attachments section. A pop-up appears.
2. Simply click or drag and drop the file from your computer (Note: Maximum file size is 20 MB). Once uploaded, click the “Close” button. You can also preview or remove attachments as needed.
Related Articles
How to create a new AR (Account Receivable) invoice in the Zuper web app
An invoice is an accounting document that a field service business sends to its clients to request payment for the services rendered. Navigation: Accounting --> Invoices --> + New Invoice 1. Select the “Invoices” icon from the left navigation menu ...How to create a project and add jobs in the Zuper web app?
Projects module in the Zuper web app allows you to create and manage multiple complex projects namely construction, interior designing, cleaning, and more. These projects often involve multiple jobs within it and can take several months to complete. ...How to create a new Job in the V2 Zuper Web App?
Our new feature allows you to create customized jobs for specific organizations or customers, ensuring that business-to-business related work orders are efficiently created with all the necessary details and properties. This feature is especially ...How to create & manage an asset inspection form in the Zuper web app?
An asset inspection form serves as a checklist for the field technician to conduct asset inspections and record maintenance activities. These forms also play a crucial role in streamlining the inspection process and improving overall efficiency. For ...How to create & manage Service Tasks?
Our Zuper’s new feature, Service Tasks, helps the field executives complete each service task mapped to the jobs. Service tasks are used to create process steps, or checklists, for the field technician to follow when completing a work order and can ...