How to create a new quotation in the Zuper web app
A quotation also known as estimate is a document that covers the parts or services you’ll need to complete a job and approximately how much they will cost.
1. Select the “Quotes” icon from the left panel and choose “+ New Quote” to create a new quote.
2. Choose either "Customer" or an "Organization."
3. Use the "+Add" button to associate the various modules.
4. A pop-up from the side will appear. Select the module and choose the "Proceed" button.
5. The billing and service contact information are filled automatically based on the organization or customer chosen.
6. Fill in the "Quote Details" section.
Here, the mandatory fields are Quote Date, Expiry Date, and Quote Template.
7. Add the products and services that need to be added to the invoice.
- Line Item - Choose this if you want to add any part or service that needs to be included in the quote.
- Bundle - Choose this if you want to add the bundle to this quote.
- Header - If you wish, you can add the "Line Items" header for identification.
- Item Group - Choose this if you want to add any items that must be included in the quote.
- Custom Line Item - Choose this if you want to add any ad-hoc line item that needs to be included in the quote.

Note: When
you add a non-billable item directly to a quote, the cost of that item will be
included in the total. This ensures that non-billable items are tracked when
manually added to the quote. However, if you include a non-billable item in a
transaction (such as a job or contract) and later convert that document into a
quote, the non-billable item will not appear on the invoice. This is because
non-billable items are excluded from the billable total.
8. Select the “Edit” icon next to the “Discount” option.
9. An “Update Discount” pop-up will appear. Edit the discount, and you can choose either % or USD and click the "Update" button. 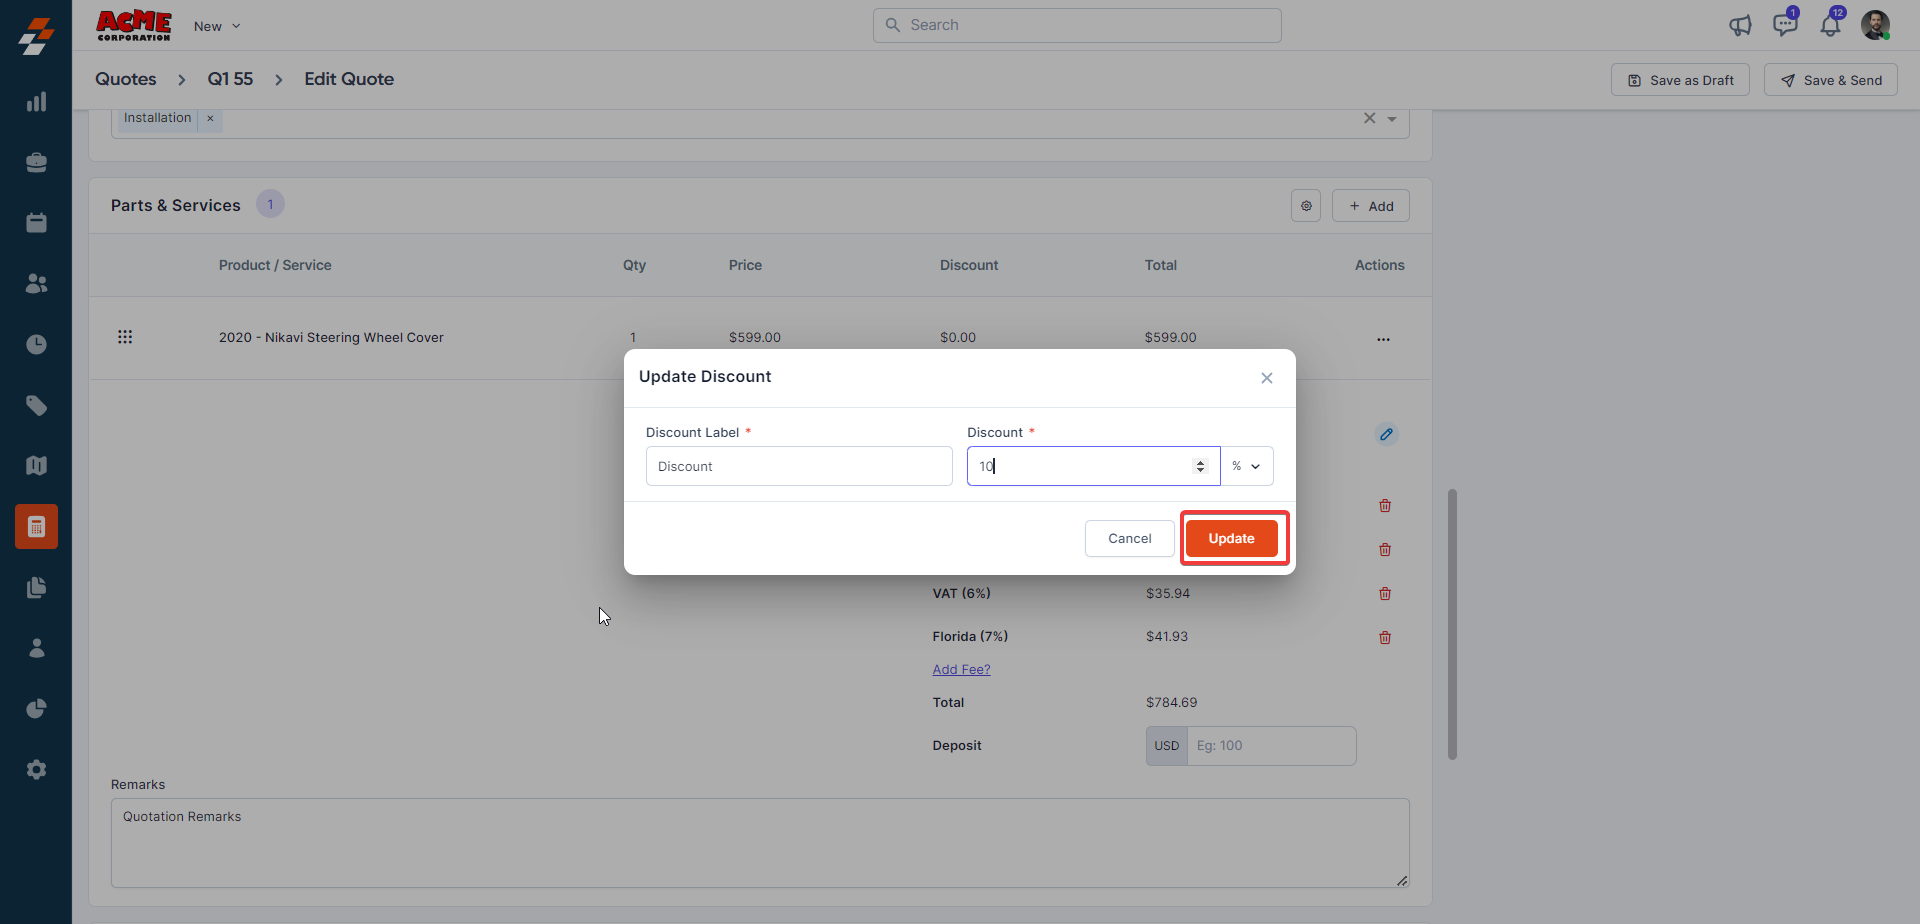
10. Select the “Settings”  icon from the item details section to modify the appropriate discount type.
11. Other details - If any custom fields are added under the settings, you can fill in the details here.
12. Click "+Add Attachments" to add the quotation-related attachments.
13. Click the “Save as Draft” button to save the quote.
14. A pop-up appears. Select the “Save as Draft” button.
The quote is created successfully.
Quotations are sent to customers before the commencement of a job for acceptance. Once accepted by the customer, technicians will perform the services or replace the parts listed in the quote to complete a job.