How to create a new property in the Zuper web app?
A property represents the physical space occupied by the customer where field technicians perform their services. It includes various resources and mapped customer details. Managing a property involves operational maintenance and control over real estate, whether residential or commercial.
 Navigation: Properties --> + New Property
1. Click the "Clients" module from the left navigation menu and select “Properties.”
2. Click the "+New Property" button from the top left corner.
3. Enter the “Primary Information” details as follows:
- Select the organization from the “Choose Organization."
- Enter the “Property Name” details.
- Upload the "Property Image."
4. Choose either "Tax Exempt" or "Taxable."
- If "Tax Exempt" is selected, tax will not be added.
- If "Taxable" is selected, tax will be added based on the specified Tax Group.
5. Choose the address with the “Pick From Map” option.
6. Select "Address" or "Geo-Coordinates." Enter the address or coordinates, and click the "Use this address" button. The address, including the landmark, city, state, country, zip code, and geo-coordinates, will be auto-filled.
7. Click the “+ Pick Customers” button to add the customer if required.
8. Select the “+ Add Attachment” option to add the property-related attachments.
9. Click the “Save Property” button to save the property.
10. Click the “Create” button to confirm the property creation.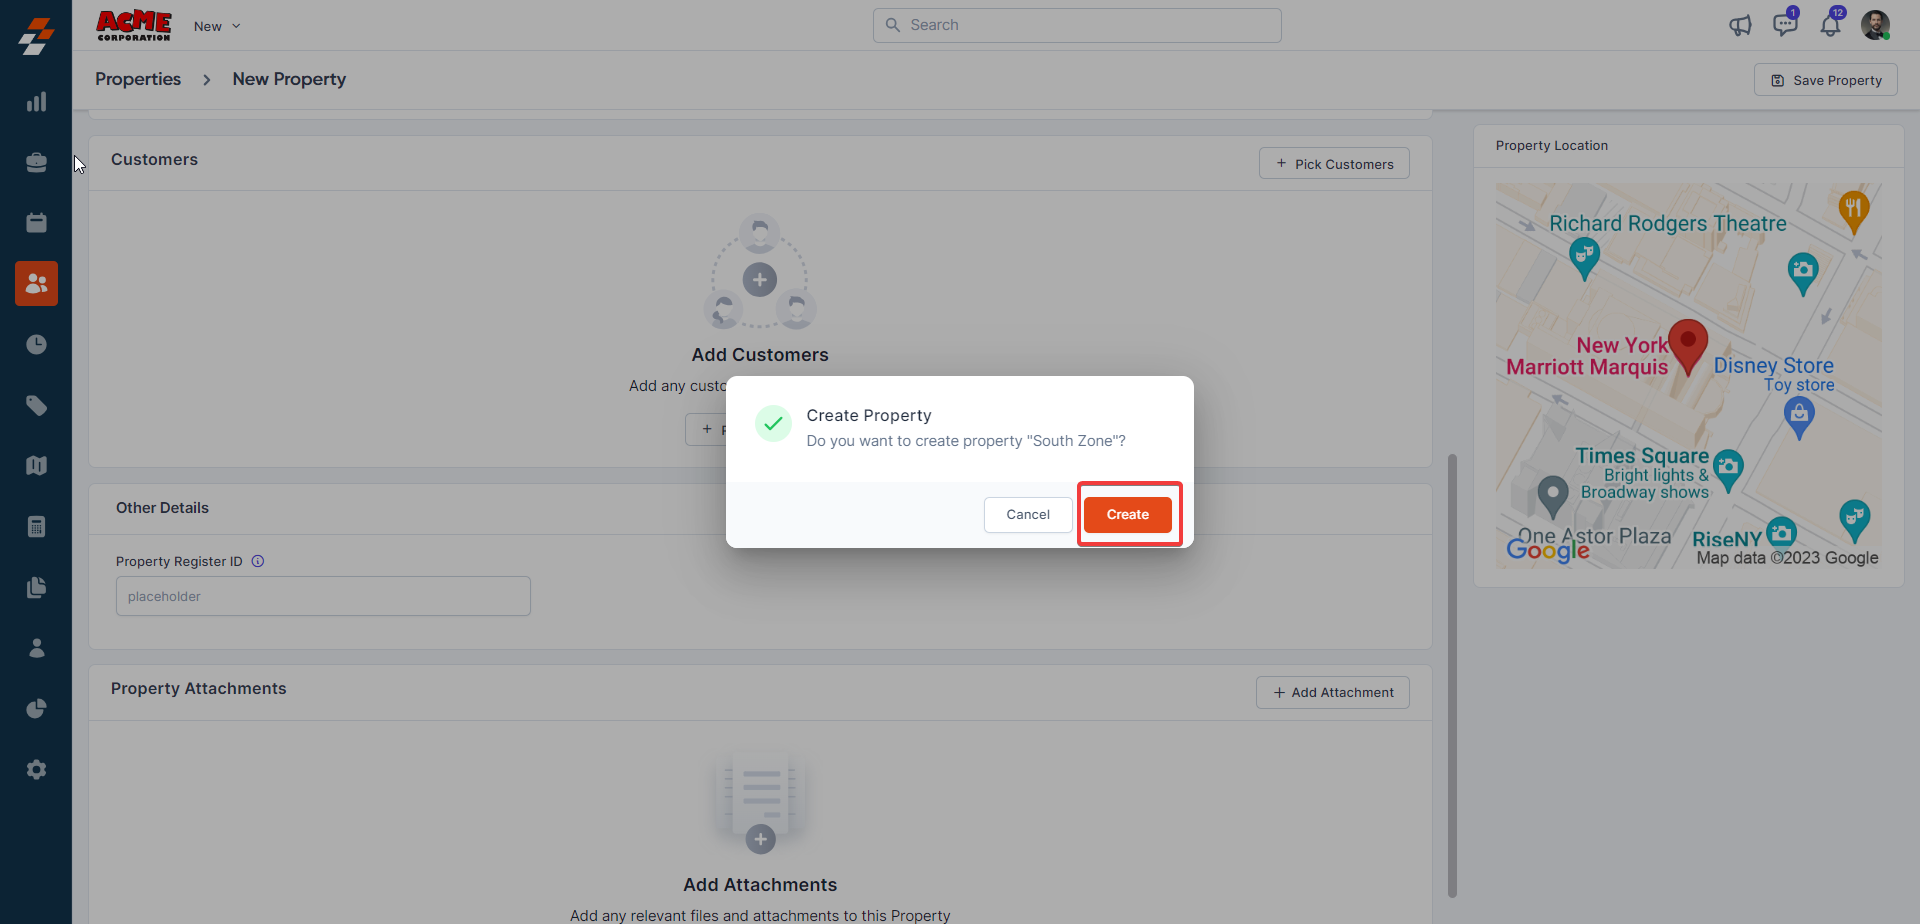
The new property is created successfully.
Creating a property is essential for associating it with multiple modules, such as assets and customers. This association allows field technicians to efficiently provide services to end customers.