The Customer details page lets you view the complete information of the customer and all its associated records in a single place. From the customer listing page, you can click any one of the Customer names to go to the customer details page.
1. Select the "Clients" module from the left navigation menu and choose the "Customers" Module.
2. Click the Customer to view the customer details.
3. The customer details have a three-column layout with information & actions available in each pane for quick access.
1. Left Pane - The quick action and various sections.
2. Center Pane - The left pane details are viewed in the center pane.
3. Right Pane - The right pane will have the other module-associated details.

Left Pane:
The Left pane contains the customer-related details. Following this information, you can notice the quick actions bar, which offers you contextual action buttons such as Call your customer, Mail your customer, and add note.
Below the quick actions bar, you can find the customer details, notes, jobs, and outbound logs.
Quick Actions:
The customer can be contacted by the Admins and back-office users such as Dispatchers, and Supervisors via Call or Mail buttons.
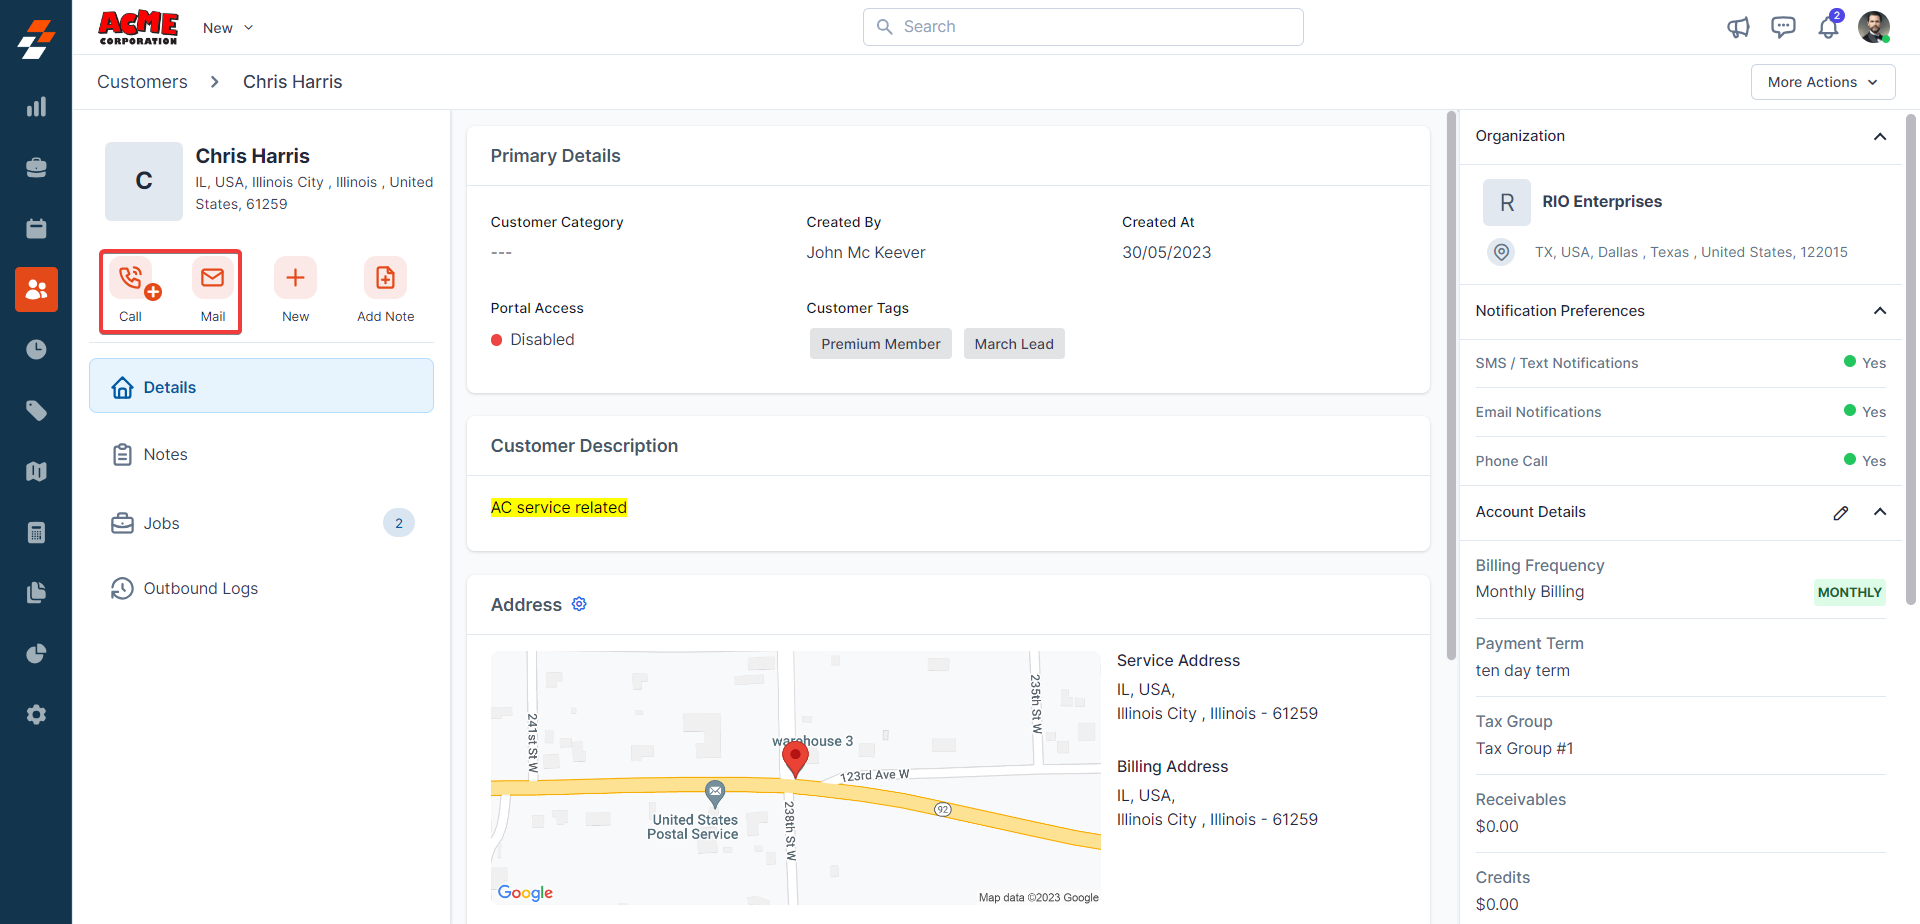
3. Click the "+ New" button to create a new Job or new quote from the Customers module.
4. Click the "+ Add Note" button to create a new note.
Customer Notes are comments or information that are added to a customer module over its course. These notes add more context to the Customer. Your notes can be anything ranging from a simple text reminder to an image of the item service and video or document. All added notes can be viewed under the Notes Section in the left pane of the Customer Details Page.
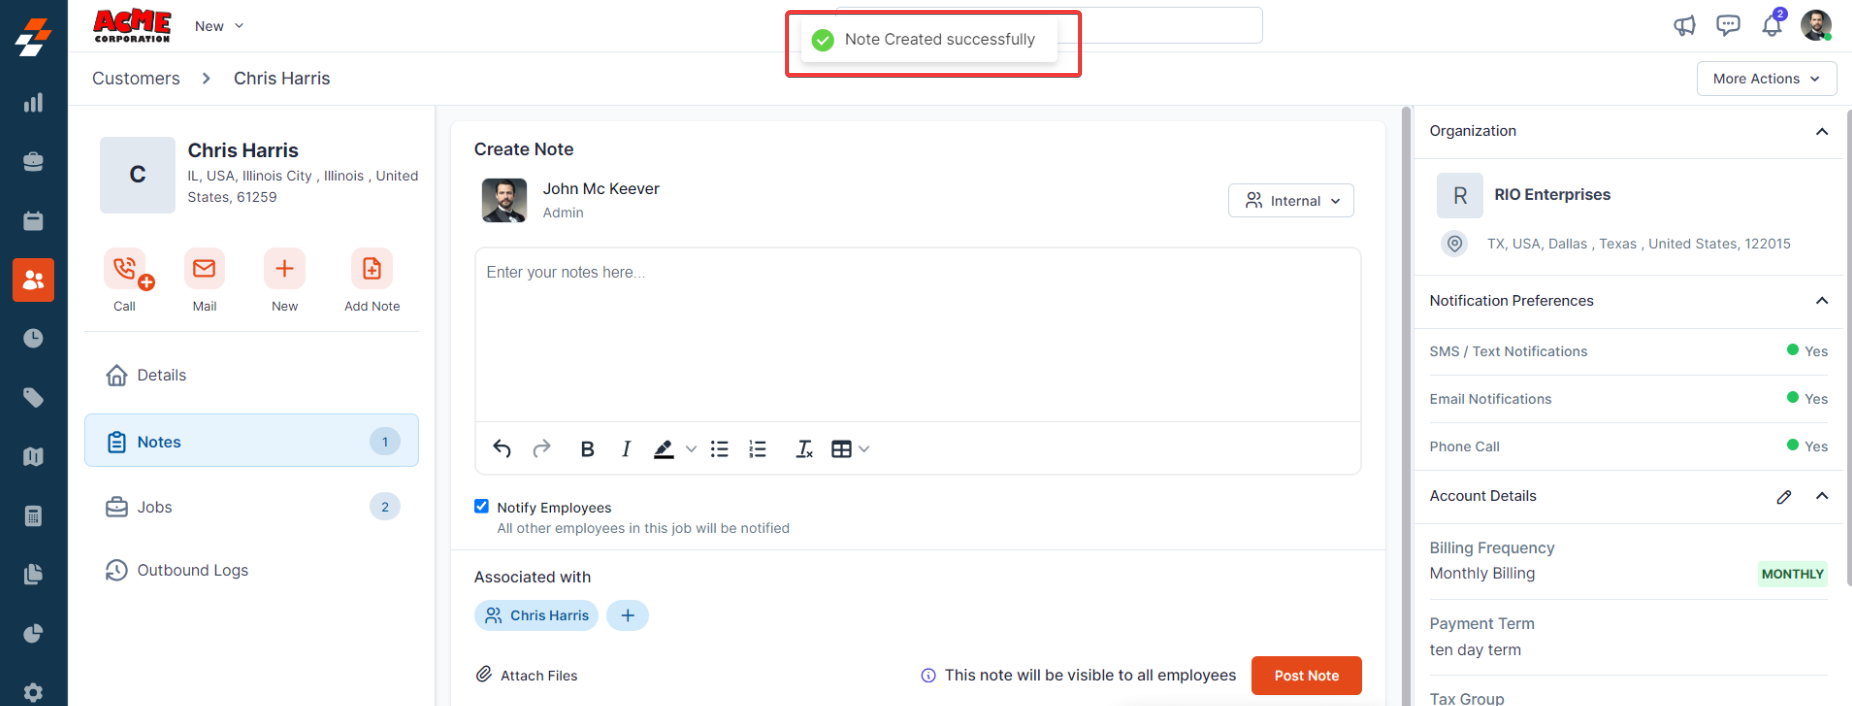
1. Click the "+Add Note" to add the notes. You can use the rich text editor to enter the note details.
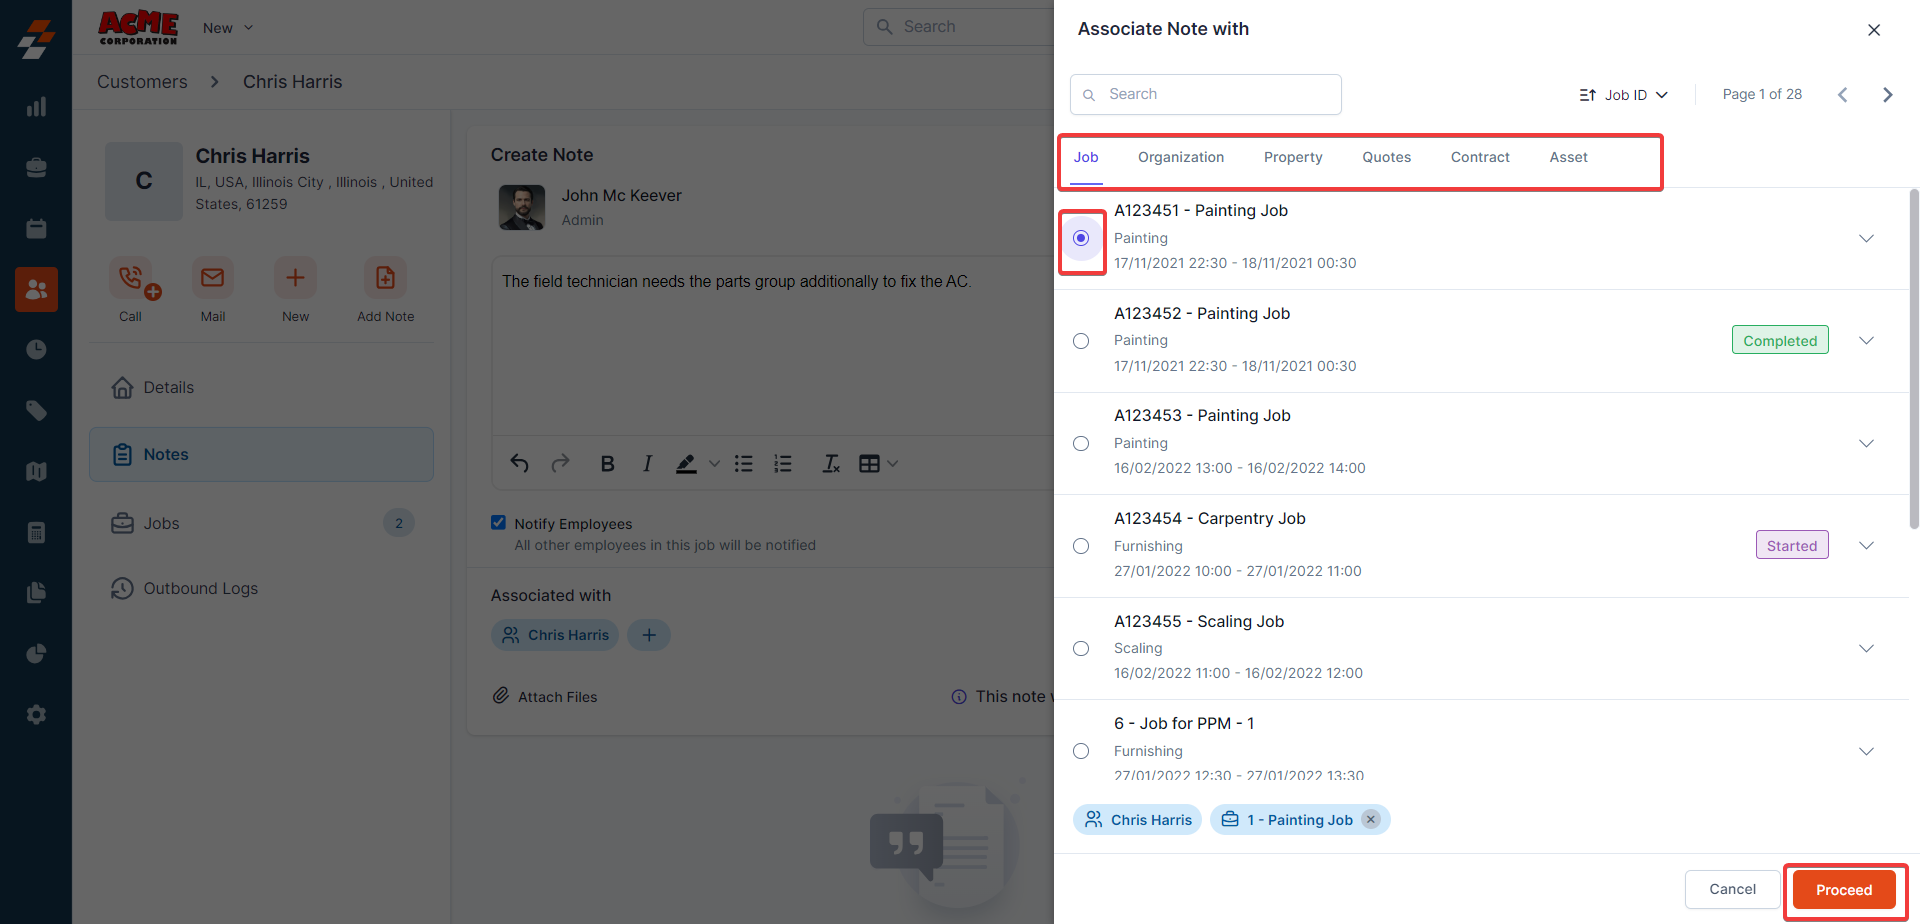
Attach Fields - Image, Audio, Video, and Document – You can add various multimedia files. Use the “+” option to associate the notes with other modules such as customer, property, etc,
2. Note Visibility:· Internal (Default) – This privacy setting will help you make the note visible to all your Zuper users in your account.
· Private – This note is visible only to the user who created the note.
· Public - This privacy setting will help you make the note public to all, including the Customer.
3. You can see the Customer module associated with the notes. Click the "Post Note" button to post the notes.
4. You can sort the notes based on the newest or oldest.
Customer Details:
1. Select the "Details" section to view all the customer-related details that cover Primary Details and Other Details (This will have customer-specific custom fields).
2. Select the "Notes" section to view all the notes created for the customer. You can also create new notes and manage them.
You can change the "Notes Privacy, Edit Note, and Delete Note."

Note: The edit and delete options are available only for the user who created the note.
3. Select the "Jobs" section to view all the associated Jobs with the customer.
Note: You can click the "Job Title" to view the job in detail.
4. Select the "Outbound Logs" view the logs specific to the customer module.
Right Pane
The right pane contains the other module details that are interlinked with the customer module.
View the Organization linked to the Customer:
1. You can view the organization linked to the Customer.
Notification Preferences
You can view the notification preferences - SMS / Text Notifications, Email Notifications, and Phone Call.
Note: Use the "Edit Customer" option to modify the notification preferences.
Account Details
You can view the account details of the customer.
1. You can view the customer's Billing Frequency and Payment Term.
Credits - It represents the amount that the customer has already paid for the invoice or deposited for the quote. It is automatically captured whenever any payment or credits are done.
Receivables - It refers to the outstanding amount that a customer owes to pay for the invoice. It is automatically captured whenever any outstanding payments are present.
The credit payments are automatically captured
2. Click the "Edit icon  " to modify the receivables and credits.
3. Add / Modify the "Credits" and "Receivables" and click the "Update" button.
4. Once you update the "Credits" details, a new section will appear - "Lifetime Value."
5. You can view the "Account Manager" details.
6.
Click the email icon, and the send  button will be visible. click to email the account manager.
7. You can view the "Payment Cards on File" if any cards are added and "Favorited Employees."
Add Quotes to the Customer
1. Click the "+" icon next to the "Quotes Associated" to create and associate the quote.
2. The customer details will be copied automatically, and click the "Save as Draft" button to create the new quote.
3. The new quotation based on the customer details is created successfully.
Add Invoices to the Customer
1. Click the "+" icon next to the "Invoices Associated" to create and associate the invoice.
2. The customer details will be copied automatically, and click the "Save as Draft" button to create the new invoice.
3. The new invoice based on the customer details is created successfully.
Add Properties to the Customer
1. Click the "+" icon next to the "Properties Associated" to create and associate the contract.
2. The customer details will be copied automatically, and click the "Create" button to create the new property.
3. The new property based on the customer details is created successfully.
Add Contracts to the Customer
1. Click the "+" icon next to the "Contracts" to create and associate the contract.
2. The customer details will be copied automatically, and click the "Create" button to create the new contract.
3. The new contract based on the customer details is created successfully.
Add Assets to the Customer
1. Click the "+" icon next to the "Assets Associated" to associate the asset.
2. The customer details will be copied automatically, and click the "Create" button to create the new asset.
3. The new asset based on the customer details is created successfully.
Recurrent Job Schedule
You can view the "Recurrent Job Schedule" if any are present.
More Actions
Under the More actions section, you can perform various actions such as:
Edit Customer, Email / SMS, Print / Send Statement, Merge Customer, Deactivate, Activate, and Delete Customer.
Edit Customer
You can edit the existing customer details and click the "Update Customer" button to save the customer.
Email / SMS Customer
1. You can send an email or SMS to the customer. Click the "Send" button.
2. The SMS / Email is sent successfully.
Print / Send Statement
1. Select “More Options” from the top left corner. Choose the “Print / Send Statement” option.
Choose from the fields.
a. Filter by Invoice Status – Select one of the options from the drop-down list.
The options are “All Status,” “Open Invoices,” and “Overdue.”
b. Statement Period – Select any one of the period ranges from the drop-down list.
The options are “This Month,” “Last Month,” “Last 3 Months,” and “Custom Range.”
c. Select any of the buttons to perform the actions.
Print – Click to print the invoice statement.
Download – Click to download the invoice statement.
Email – Click to Email the invoice statement.
Note: You can preview the invoice statement in the right-side panel of the pop-up. Merge Customer
Now, the users can easily combine the customers without any hassle. The merge customer option can be done once and cannot be reversed.
Choose the "Primary" customer and click the "Merge" button to join the other customer details to the primary contact.
Deactivate Customer
You can deactivate the customer temporarily, and later, you can activate them.
Note: Once you deactivate the customer, you will get an option to either delete or re-activate the customer again.
After the new customer creation or when you need to modify the existing customer details, you can perform lots of major actions from the customer details page.