How to manage timelogs in projects from the Zuper web app?
The timelogs section in the projects module allows you to view the timelogs of all users/technicians who have worked on the project, providing a detailed record of each user’s work hours spent on assigned jobs within the project for specific dates. You can also manually add new Timelog entries for users/technicians who missed clock-in and clock-out from mobile app.
 Navigation: Projects --> Project --> Details Page (Time Log)
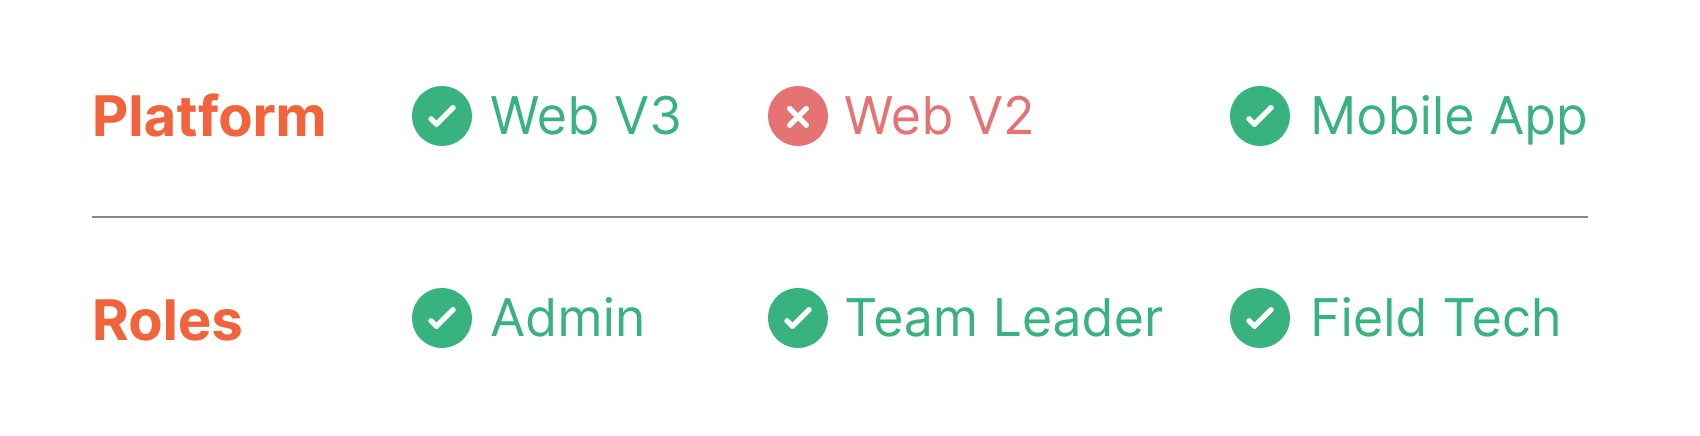 Pre-requisites
- The “Timelogs” section is only available within the V3 web and mobile app of the Projects module. If you are on V2, you can get started with V3 using the link below. Your login credentials would be the same as that for V2.
https://web.zuperpro.com/login - If you are experiencing issues accessing the V3 Web or mobile app, please reach out to us at support@zuper.co
- Project Timelogs should be enabled under Settings > Organization Settings > Project Settings.
Clock-in/Clock out from the mobile app
Technicians can now clock-in and clock-out of a project either with or without a job using the mobile app. Below are the steps to clock-in and clock-out of a project:
1. Select the "Projects" module from the top-left hamburger icon.
2. You can view the Projects that you’re assigned to. Select the relevant project to view its details.
3. On the details page, click on “Clock-in” above the “Update status" button. You will be prompted to clock in to the project either with or without a job.
4. If you proceed to clock in with a job, you will be asked to select the job for which you want to add the timelog.
Note: Only jobs within the project that the user/technician is assigned to are displayed. The user can select only one job at a time. Cancelled, and Closed jobs will not be displayed.
5. Once a job is selected, the timer begins for that job.
6. To pause the timer, tap the pause button, which clocks the user out of the job. To resume working on the job again, you need to clock in again, and the timer will restart for the specific date.
6. The added timelog is then reflected in the “My Timelogs” section of a project. You can then view timelogs for a preferred time range by applying time range filters.
Accessing timelogs from web
All the clock-in and clock-out entries added from the mobile app are reflected under the “Timelogs” section of the respective project. The Back office can view these Timelogs from the web and add new entries, as needed. Here’s how:
1. Click the "Projects" icon from the left navigation menu. You can view the list of projects with project name, category, status, priority, and other details on the projects listing page.
2. Select the project for which you want to view or add Timelogs.
3. The selected project details page appears.
Click the "Timelogs" section on the left under "Navigation." You can view all the users’ timelog entries for the selected date range on the top-right.
4. Each entry has four attributes- Job/Project, User, Date, Duration.
- Jobs: This represents the jobs that the users worked within the project. Entries not associated with a job would be mapped to the project name.
- Users: This represents the users assigned to a project/job.
- Date: This indicates the dates when the user worked on the assigned Job/project.
- Duration: This represents the total time spent by a specific user, on a specific job/project or on a specific date based on the grouping.
To help you better understand timelog entry, here’s an example. Consider technician “John Doe,” who worked on two jobs, ‘Installation’ and ‘Electrical Wiring,’ on different dates for an HVAC Installation project. His clock-in/out entries for the two jobs are as follows:
Job 1: Installation
Date: 23rd June
- Clocked in at: 10:00 AM, Clocked out at: 12:00 PM
- Clocked in at: 4:00 PM, Clocked out at: 6:00 PM
Date: 24th June
- Clocked in at: 9:00 AM, Clocked out at: 11:00 AM
- Clocked in at: 1:00 PM, Clocked out at: 3:00 PM
Job 2: Electrical Wiring
Date: 24th June
- Clocked in at: 4:00 PM, Clocked out at: 6:00 PM
Date: 25th June
- Clocked in at 11:00 AM, Clocked out at: 2:00 PM
Based on the technician/user’s above clock-in/clock-out entries from the mobile app, here’s how it will reflect in the Project Timelogs section on the web:
User | Job | Date | Duration |
John Doe | Installation | 23rd June | 4 hours |
John Doe | Installation | 24th June | 4 hours |
John Doe | Electrical wiring | 24th June | 2 hours |
John Doe | Electrical wiring | 25th June | 3 hours |
Observe the following from the above table:
- Multiple entries recorded for the same job on different dates:
When the technician has clocked in and out for the same job on different dates, it will be reflected as multiple entries. For example, for the job 'Installation', there are two separate entries for 23rd June and 24th June.
- Multiple Clock-in/Out entries for a job on the same day are combined:
When the technician clocks in and out of a job multiple times on the same day, they are combined into a single entry for that date (you can still view the breakdown of each entry). For example, for 'Installation' on 23rd June, John Doe has clock-in/out entries from 10:00 AM to 12:00 PM and from 4:00 PM to 6:00 PM. These entries are combined into a single entry with a total duration of 4 hours.
- Separate entries recorded for different jobs on the same day:
When the technician clocks in and out on the same day for different jobs, they will be reflected as separate entries. For example, on 24th June, John Doe has entries for both 'Installation' and 'Electrical Wiring', and these are reflected as separate entries.
Grouping:
Entries can be grouped by Users, Jobs and Date. Here is how the above entries would look under each grouping:
User grouping
You can also view the summary or breakdown for each entry. The following would be the summary of the first entry highlighted above:
Jobs grouping
The following would be the summary of the entry highlighted above:
Date grouping
The following would be the summary of the entry highlighted above
Adding and managing entries
In addition to viewing timelogs, you can add new entries and manage each user’s timelog directly from the web. This includes viewing the summary, editing, and deleting entries.
Adding entry
To add an entry, follow these steps:
1. Click the “+ Add Entry” button on the top right corner.
2. A dialog box will appear with the clock-in/clock-out date and time defaulting to the current date and time which you can change as needed.
3. In addition to the clock-in/out date and time, you will be prompted to provide the below details to create an entry:
- Choose Job: Select the job to clock in from the drop-down menu. You can also proceed without choosing a job.
- Assigned User (Mandatory): Choose the user for whom you need to add the entry for from the drop-down menu.
Note: If a job is selected, only users assigned to the job will be displayed. You can choose only one user at a time.
- Clock-in (Mandatory): Choose the clock-in date and time using the picker.
- Clock-Out (Mandatory): Choose the clock-out date and time using the picker.
- Reason: Provide a reason for the entry.
4. Once done, click the “Create” button. The timelog will be successfully created for the user.
5. You can also add a new timelog entry from grouping as shown below.
Managing entries
You can manage entries such as viewing summaries, editing entries, and deleting a user's entry. To manage a user’s timelog, follow these steps:
View Summary
1. Click the “kebab” icon next to the user whose summary you want to view and select “View Summary.”
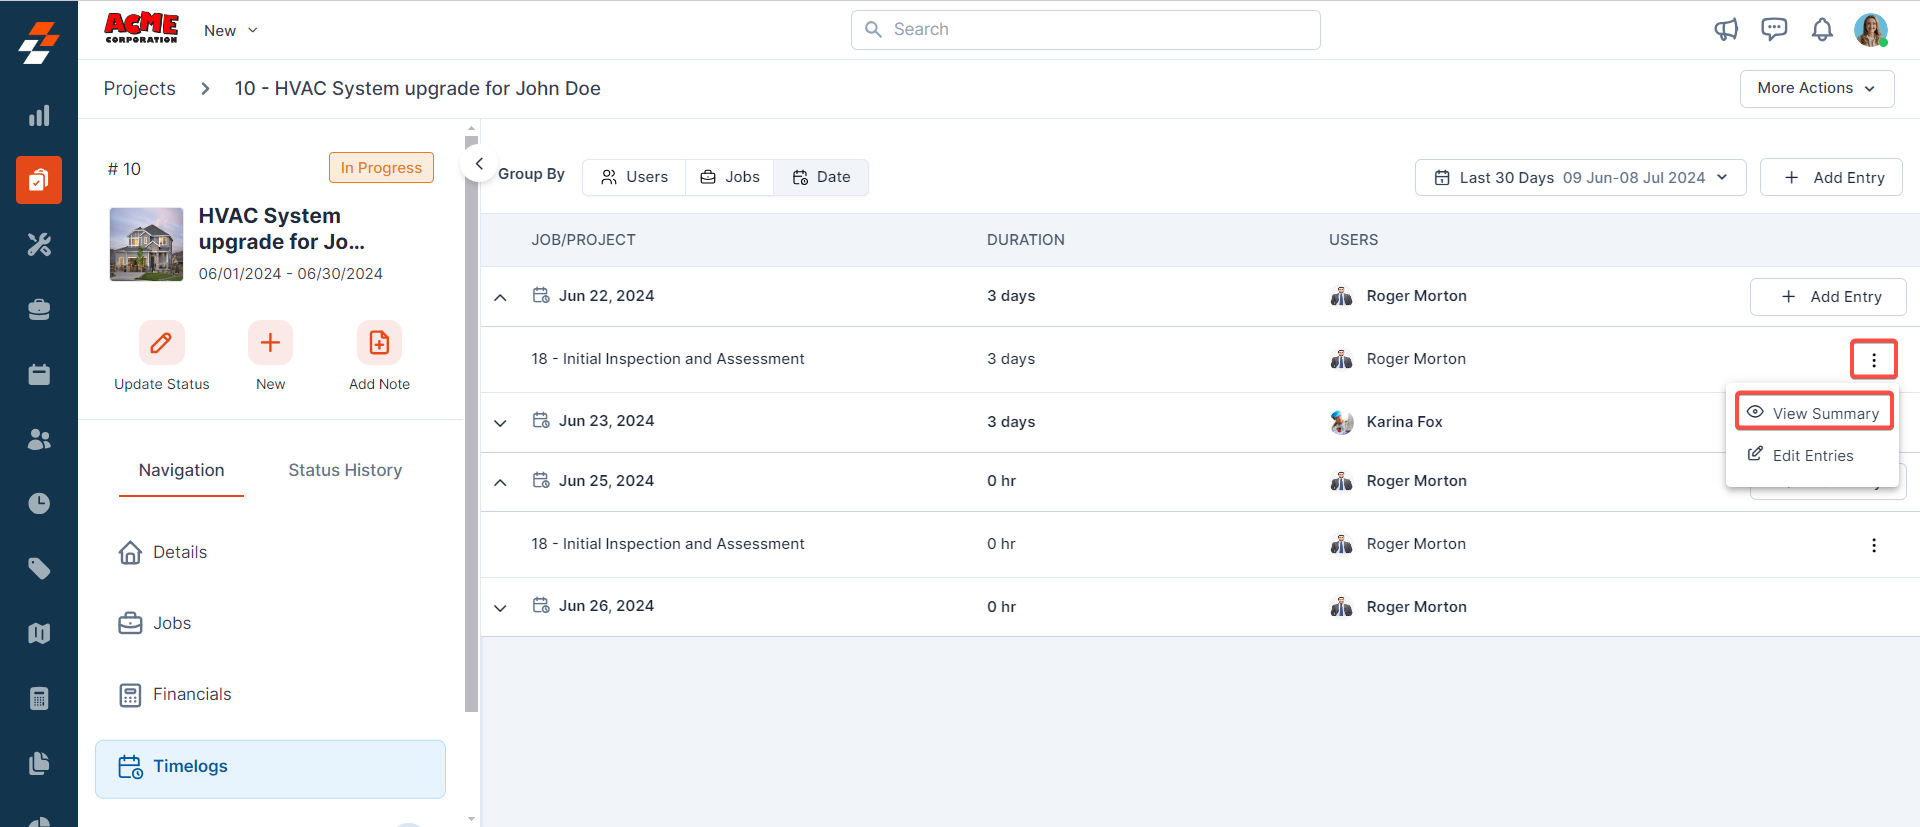
2. A pop-up appears with a detailed summary of their entries, including the total hours worked for the job on the date.
Edit/Delete entries
1. Click the “kebab” icon next to the user whose entry you want to edit or delete and select “Edit Entries.”
2. A dialog box will appear with the current details of the entry. Click the “Edit” or “Delete” icon as needed.
Once the user’s entry details are modified, click the “Update” button to save the entry.
Related Articles
How to navigate and manage projects listing page in the Zuper web app?
The projects listing page provides an overview of the projects you have access to with summarized information like project number, name, status, and other records. (For step-by-step instructions on how to create a project, click here). Once created, ...How to configure timelog in Zuper
Overview of Timelog The Timelog feature in Zuper transforms how organizations manage and track the time that field technicians spend on job-related activities. Initially, Zuper facilitated clock-in and clock-out automatically; however, the enhanced ...How to access and manage time off requests in the Zuper web app?
Time-off requests are submitted by users when they need to take leave for reasons such as illness or personal matters. As an admin in Zuper, you can not only view and manage these requests but also submit time-off requests on behalf of users. You can ...How to manage your customers' assets / installed base in the Zuper web app
Any item purchased by a company as a product and, when distributed to a customer service location to fulfill a job, contract, or service agreement, is referred to as an asset. Additionally, the asset can either be owned by the customer or by the ...How to create and manage your PPM in the Zuper web app?
Planned Preventive Maintenance (PPM) is a proactive approach to maintaining equipment, machinery, or systems by scheduling regular inspections, servicing, and repairs before any issues arise. The goal of PPM is to minimize the risk of unexpected ...